Mac Setup
Sequoia and Newer
Welcome to the getting started guide. Here's what you have received in your PodASS Kit List.
To begin, you need to select if you're on a Mac or a PC.
Mac Setup (Pre-Sequoia)Mac Setup (Sequoia and Newer)PC Setup
If you are using Screening Room pro, here are is a Screening Room Pro Integration Guide.
If you're having any difficulties, visit out troubleshooting guide or contact us at support@capsulemedia.com
If you need to re-install the listener software, view the instructions.
Mac Setup
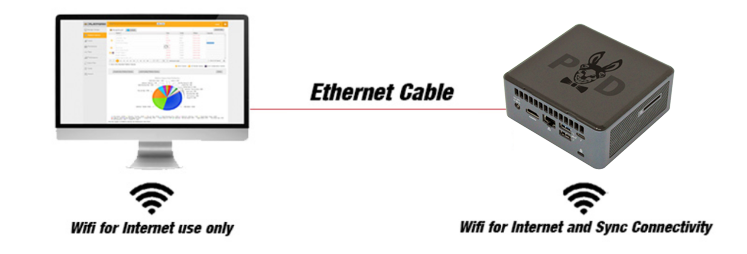
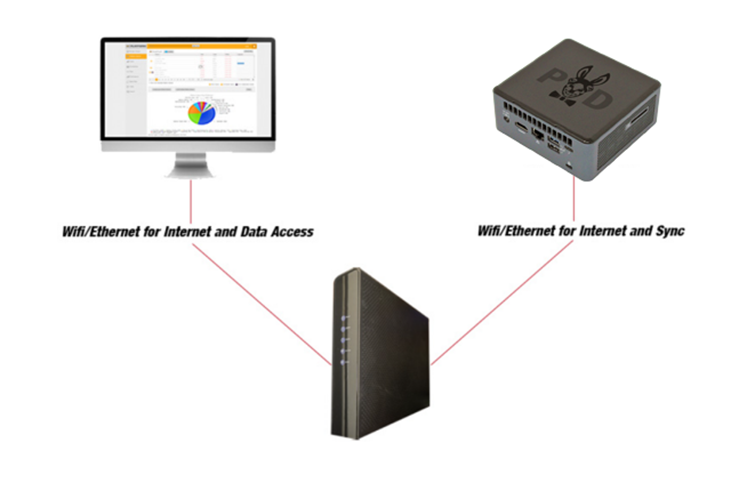
There are two Methods of connecting the POD to your Edit Station.
(#1) Direct Connect (to your computer)
(#2) Connect to you office or home Internet router
Steps For setting POD with MAC OS
1. Plug POD with power and network cable to MAC
2. Power up the POD (wait 5 minutes for the full bootup of the POD)
3. Open Chrome or Safari (Firefox not supported) and go to http://mediahub.local:8080
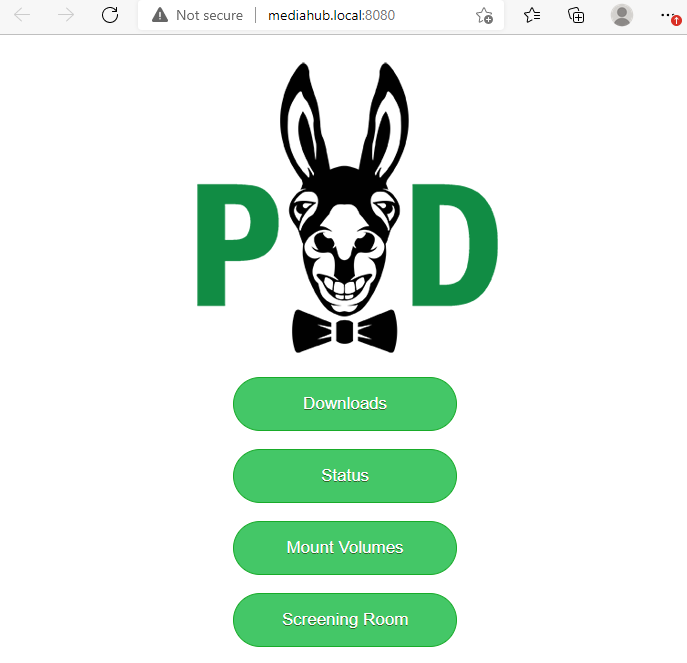
4. Click the “Downloads” button
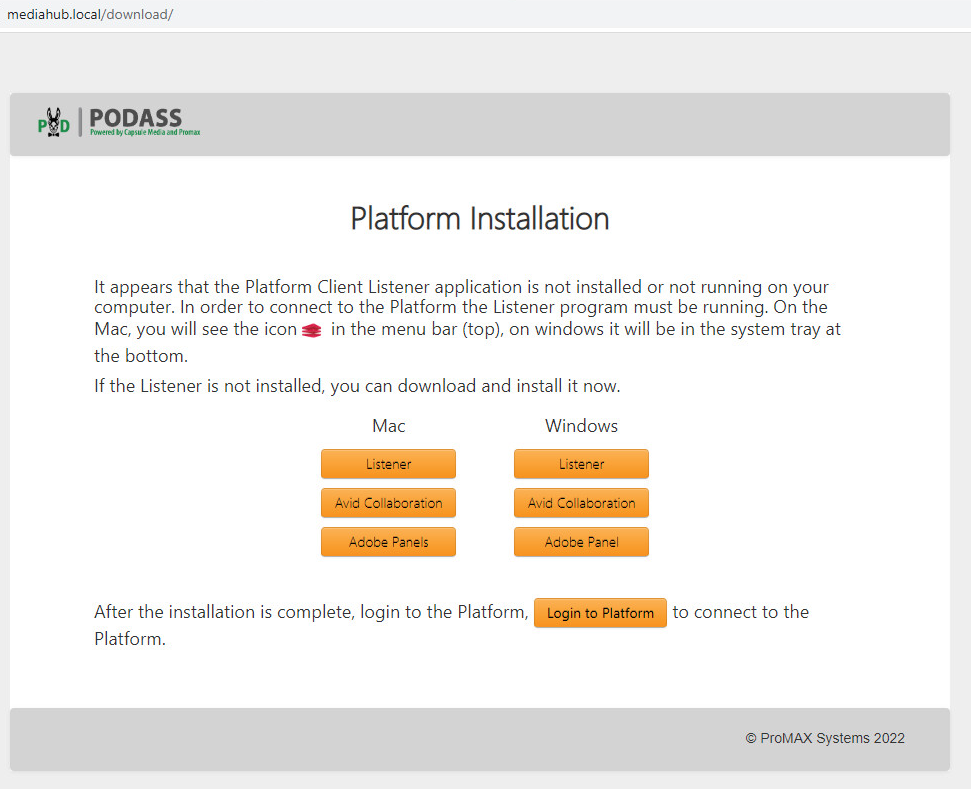
5. Download Listener, Avid Collaboration and Adobe Panel
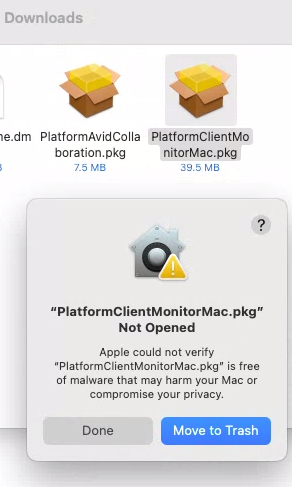
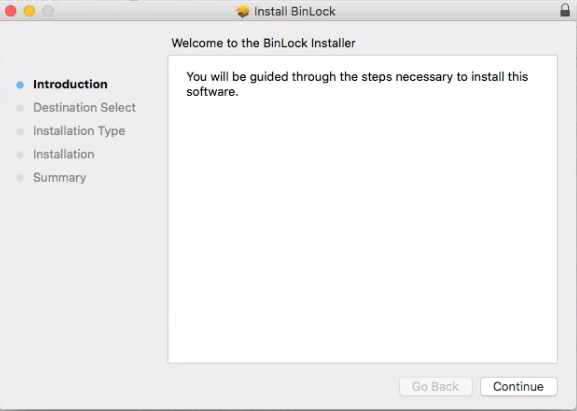
6. Install Listener PlatformClientMonitorMac.pkg by right clicking and selecting “Open With” > “Installer” and Click Done.
7. On your Mac, choose Apple menu > System Settings, then click Privacy & Security in the sidebar. (You may need to scroll down.) Go to Security, then click “Open Anyway”
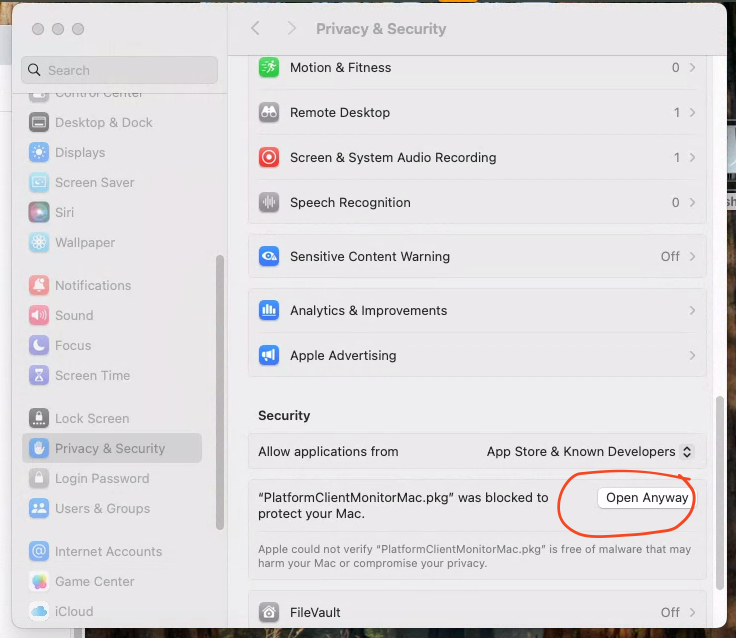
8. Click “Open Anyway”

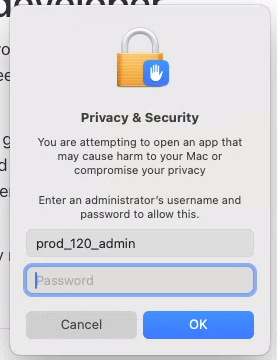
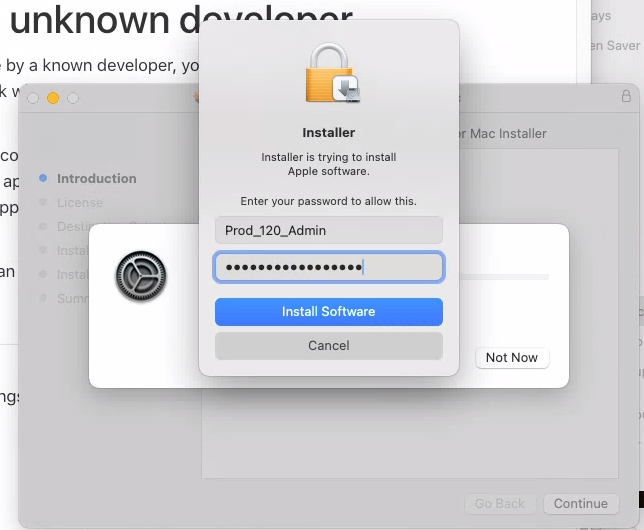
9. Enter your login password, then click “OK”
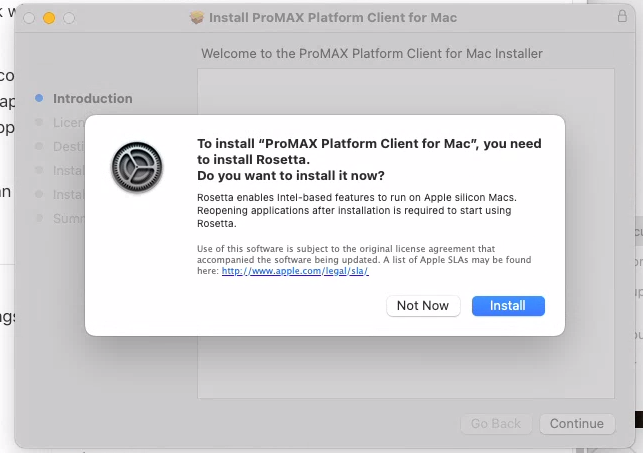
10. Click “Install”
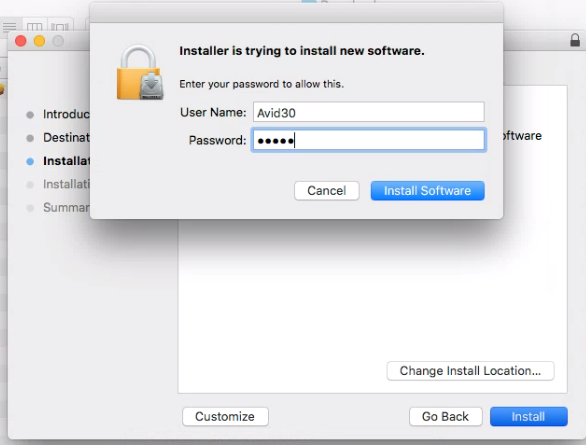
11. Click “Install Software” with the provided and password
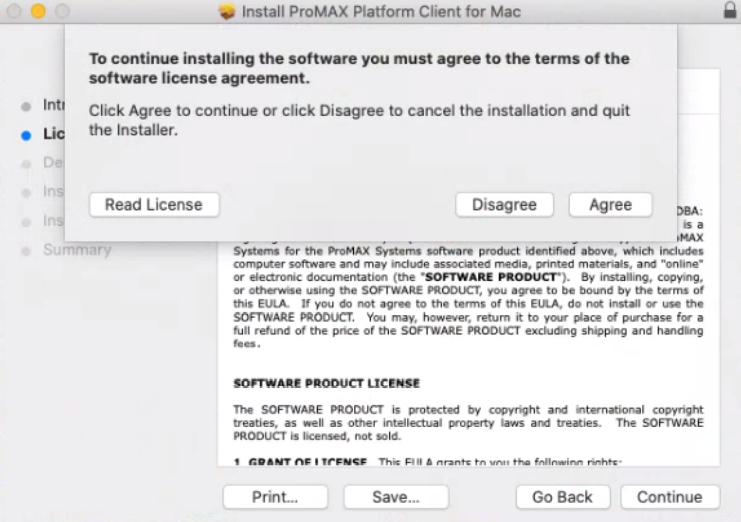
12. Click “Agree”
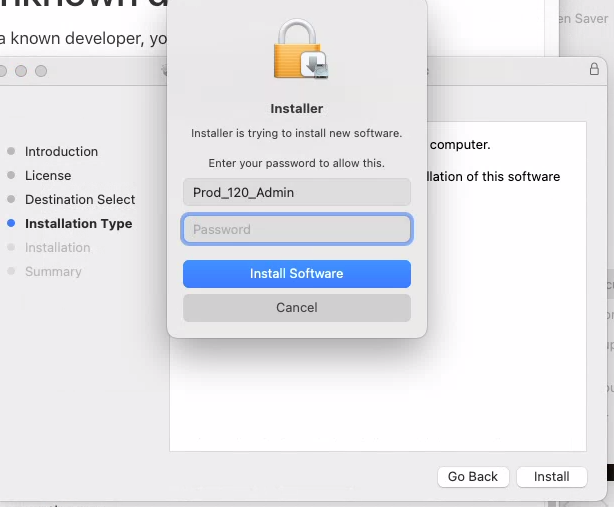
13. Click “Install Software” with the provided and password
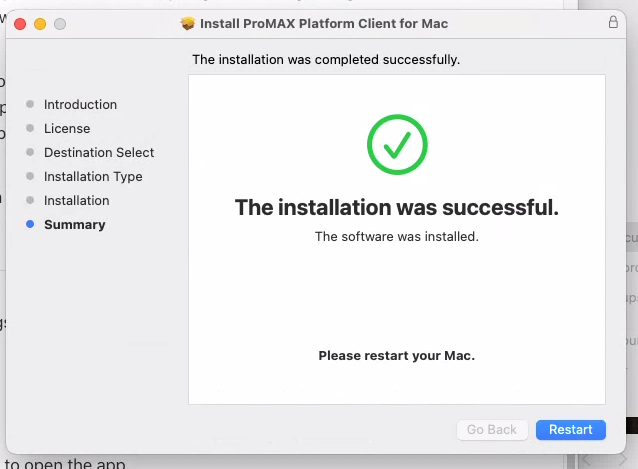
14. After installed you will be asked to reboot your system.
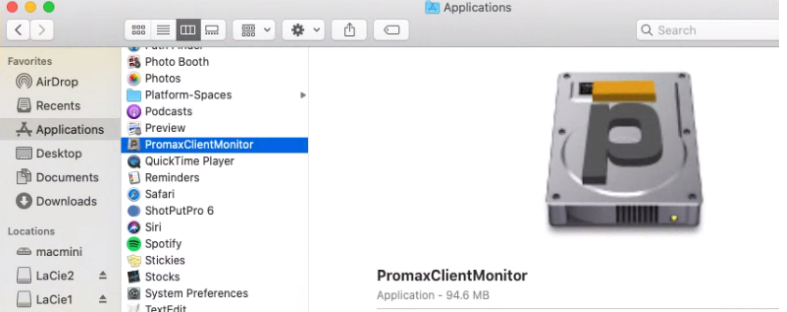
15. Once system has rebooted go to Applications and launch “PromaxClientMonitor”
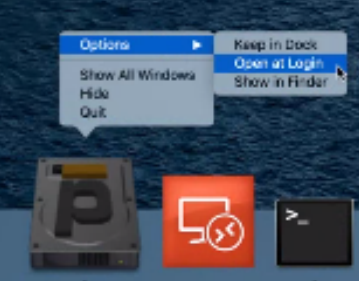
16. You will see the app in the top bar when running.

17. Right click on Promax App in Dock set it to “Open at Login.”
Avid Collaboration Setup
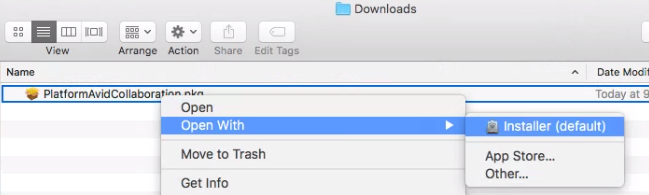
18. Right Click on PromaxAvidCollaboration.pkg and choose “Open With” > “Installer”
19. Click “Continue”
20. Click “Install”

21. Enter your Admin user and Password. Click “Install Software”
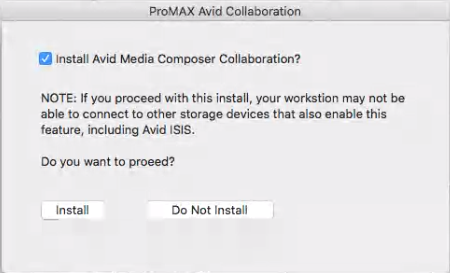
22. Another window will pop up. Select “Install Avid Media Composer Collaboration” then click “Install”
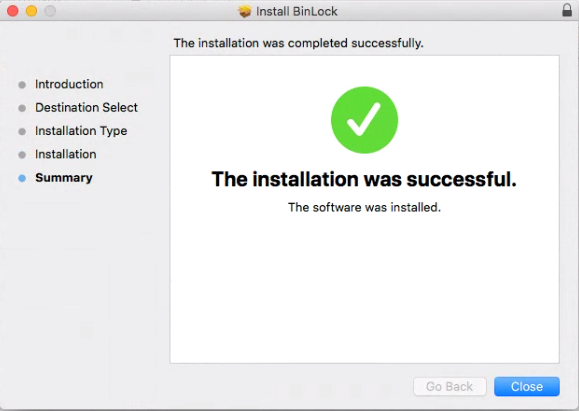
23. Click “Close.” Once Avid Collaboration tool installed, go to http://mediahub.local:8080
24. Click on “Mount Volumes”
25. Log in using info provided or email support@capsulemedia.com for user and password info
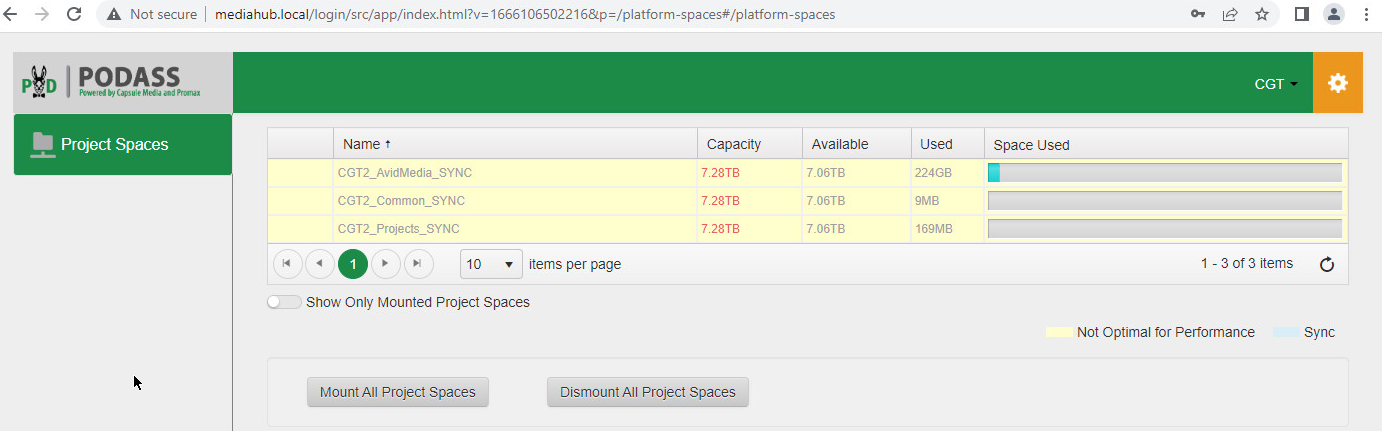
This is where you can mount and unmount Volumes just by clicking on the name of the Volume you want mounted.
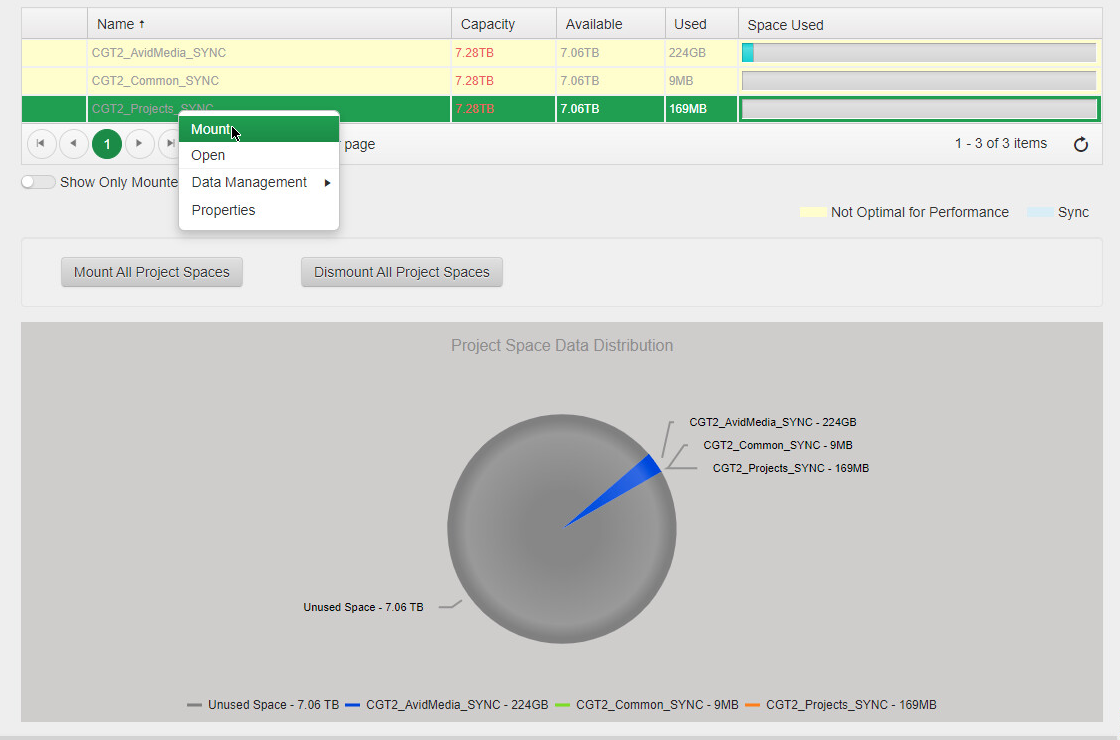
Or you can right click and select “Mount”
The first time you mount a Volume you might get asked for permission. Click “OK”
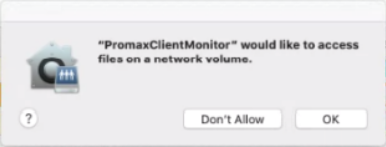
If you click “don’t allow” by mistake you can change your setting manually here.

Make sure PromaxClientMonitor has Full Disk Access.
26. If you chose Option #2 and connected the POD to your Router you are now done setting up the POD.
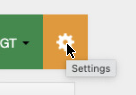
27. If you chose Option #1 and connected the POD directly to your MAC then you need to connect the POD to your home WIFI for file sync. Click “Settings.”
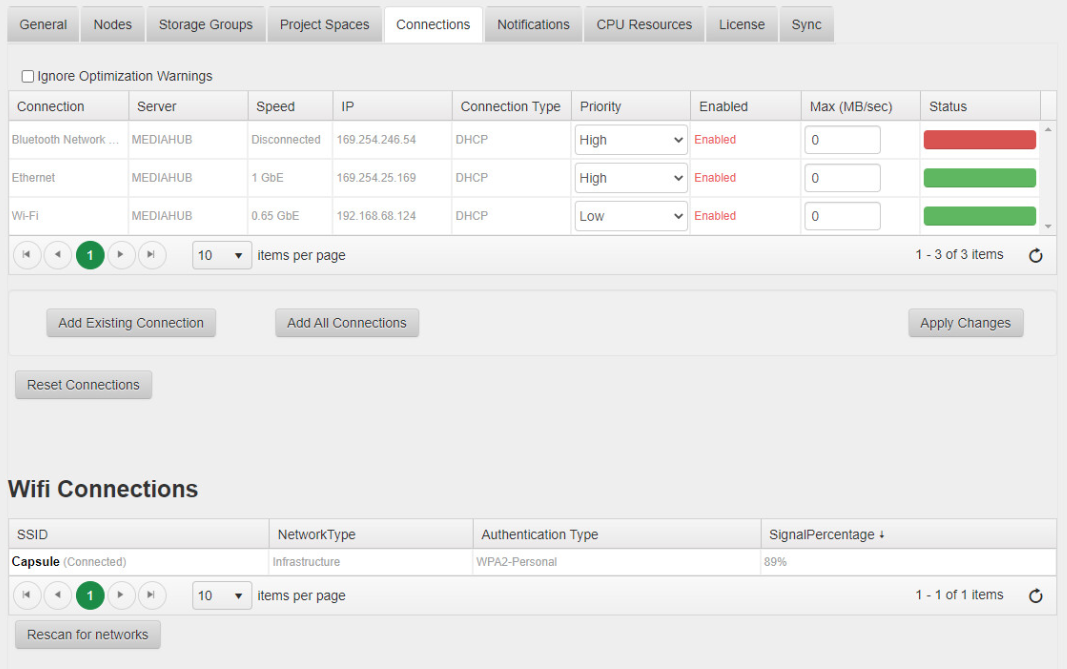
28. Click on “Connections”
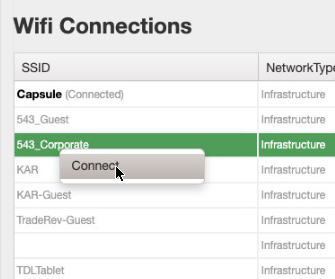
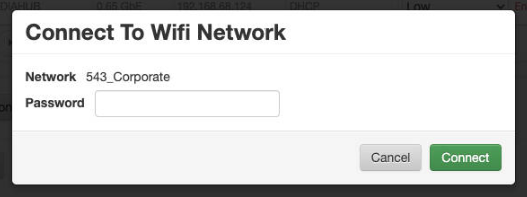
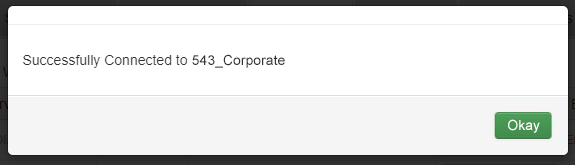
29. Find your Home WiFi at the bottom and right click to connect.
Congratulations, you are now set up and ready to go.
If your Avid does not see the POD Media Drives – visit our Troubleshooting page.